If you imagine a view of a tabletop wargame, what do you see? I bet, that the first two things, what you think of, are the painted miniatures, and the terrain. Obviously, these are the most important. But what is the third thing? Thats a harder question... At first, but after thinking a while my answer is pretty clear: banners!

A medieval or fantasy battlefield looks without banners a bit naked. Look at this painting of Battle of Grunwald, how would this look without banners? Especially in a rank and flank game, like Oathmark, banners help a lot to have an overview about the units on the field. And honestly, they look cool.
So, if we can agree about the need of banners, we can jump to the point, how to get them. You can buy some, of course, on the Northstar page, there are a lot of beautiful options. But they are not really cheap, end at the end, you need to fit them on the figures somehow. So its not an instant solution, there is work with it too. But creating own banners is much cheaper, so lets take a look on the two steps of making banners:
- Design
- Physical realization
- Copy something existing
- Design something individual
The easier (and for historical wargaming the main) is to simple search on the internet after banners. There is not much to say about this, except maybe two things:
- Count together, how many units you will have, and try to find as many banners in the same style. Because differing designs could look lame on the table.
- Dont want something too detailed, because you will have to print it on a small piece of paper, so small things wont be visible anyway.
- If you are an artist, you can draw your own.
- If you are not an artist (what is probably the bigger group), you will need aid for it... There are some banner designing software around the internet, you can select the most fitting for you. My choice was Worldspinners heraldry artist. Its pretty simple to use, the are enough options for pattern, color and symbols. If you want your design in high resolution, you have to sign up. But honestly, for this usage, a print-screen is enough.
- For this, you still will need a PC... Actually its an optional step, but make the next things much easier. The flags should be double sided, so with any drawing software, we need something like this. It will bend around the pole, so it has to be a bit longer then needed, I filled the gap between the two sides with colored squares:

- Print it! It sound easy, but it has to be the appropriate size... Well, thats a try and error process. But at the end, it will succeed.

- At last, something to touch! Cut it to the proper size around the edges.

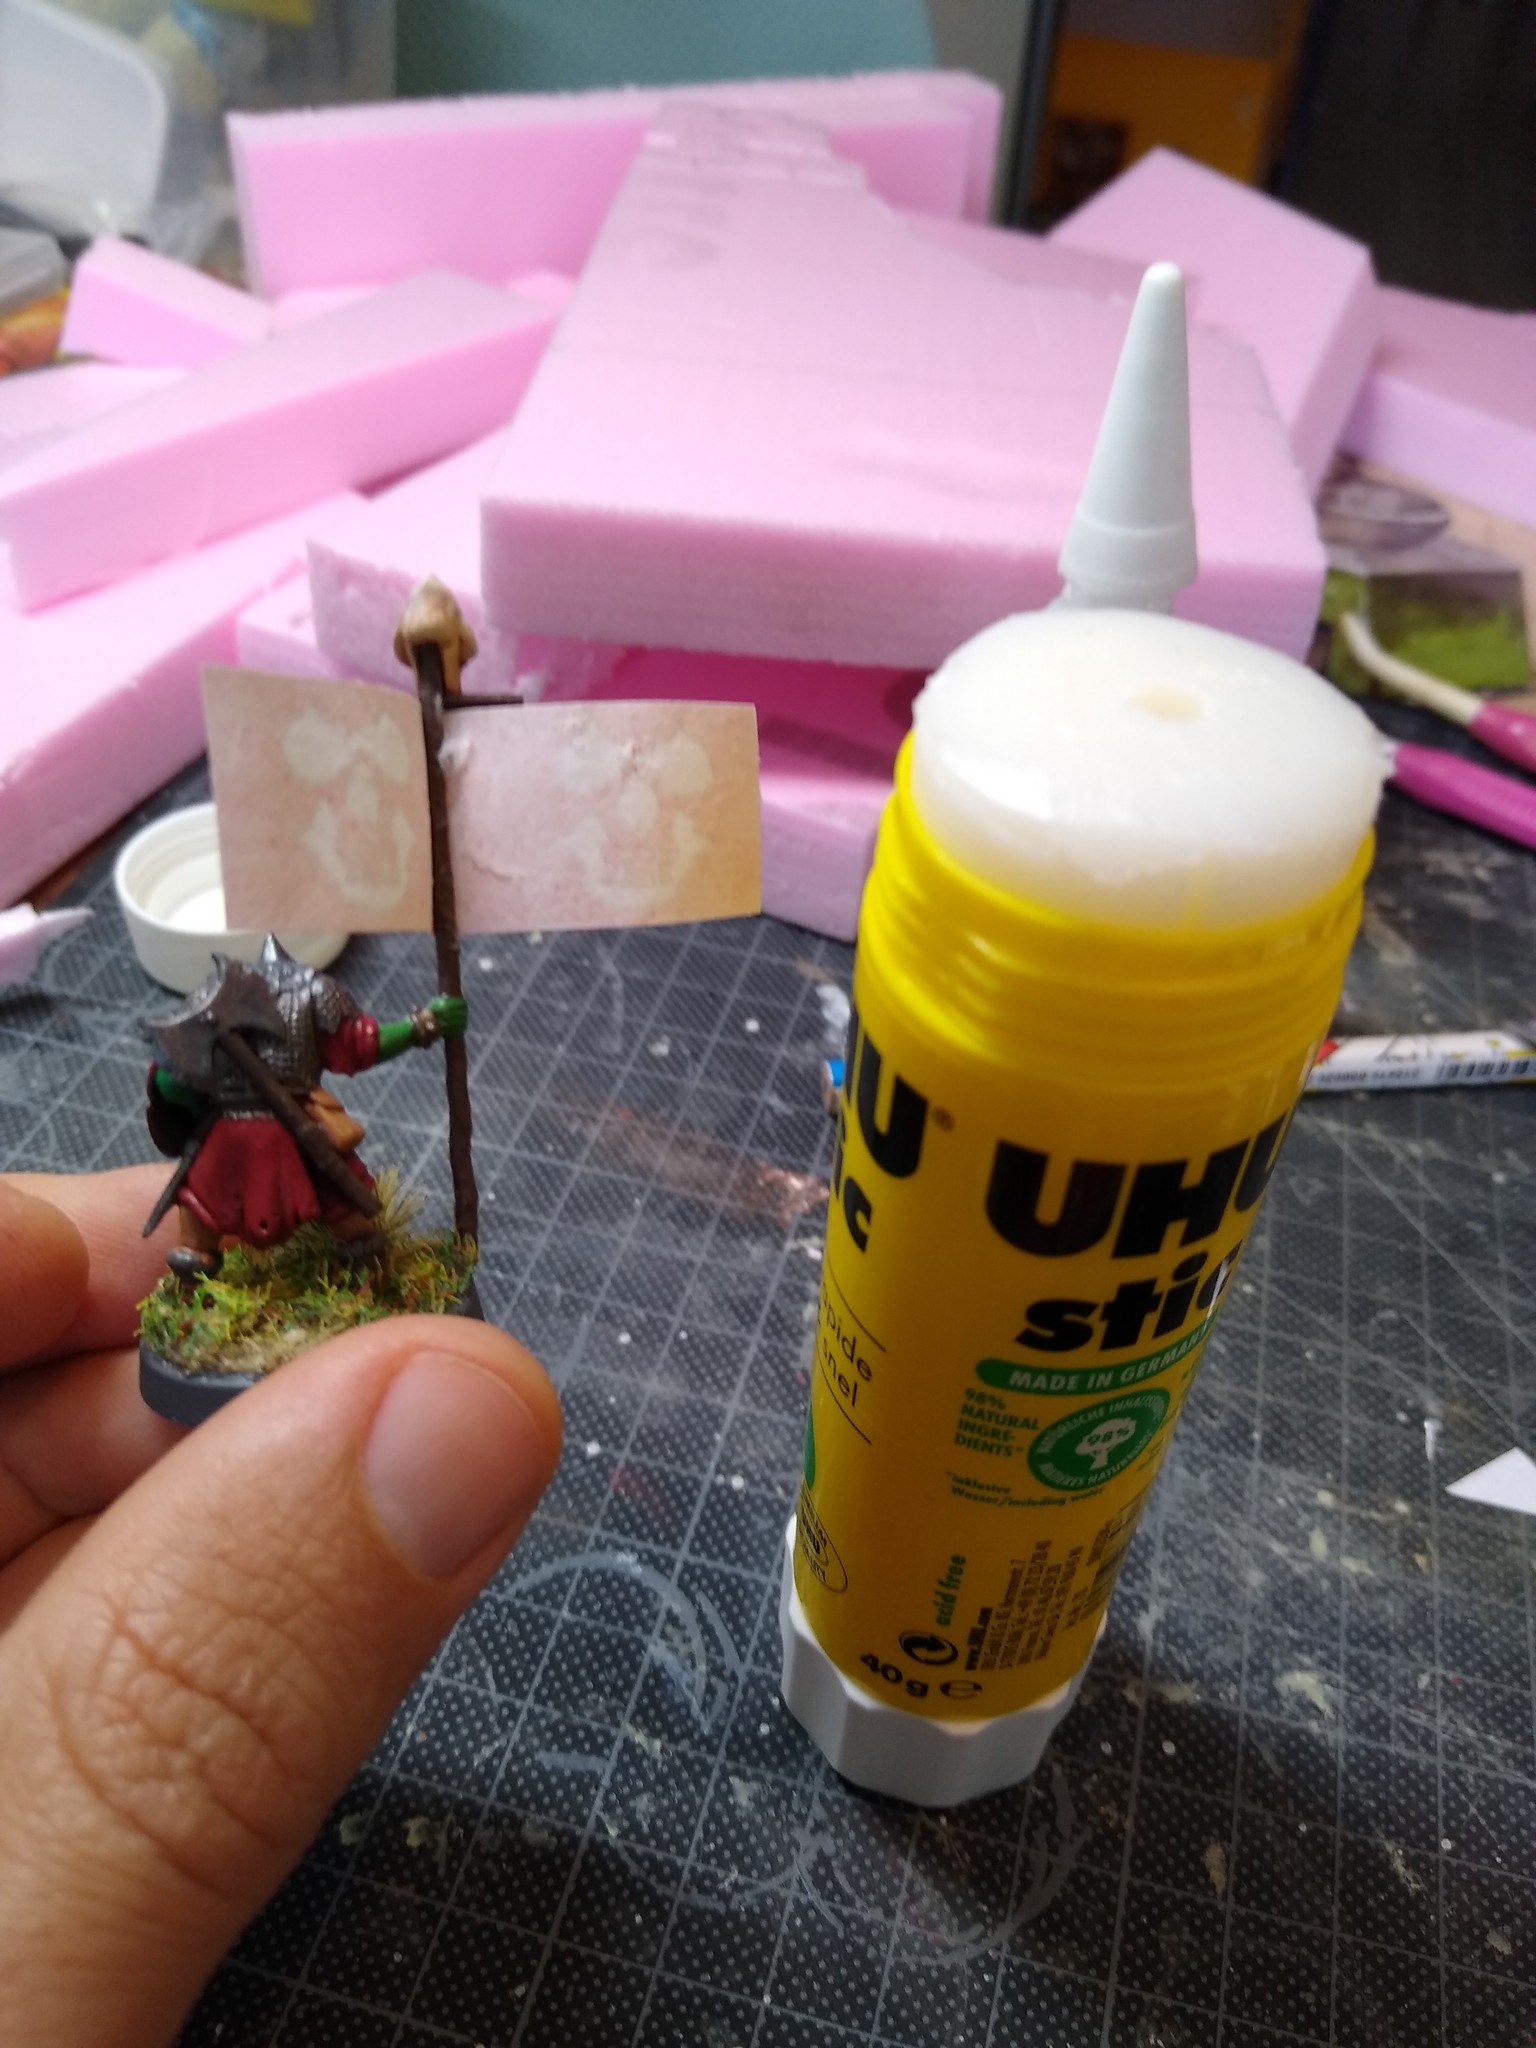
- Take your ready painted miniature with a flagpole, put a little (very little!) bit superglue on it, where the banner will be. Dont forget to dry fit it before, and its better to bend the middle of the flag before (but not a sharp bent, try to bend it around the pole). Glue the paper to the pole, and only to the pole.
- Take a glue stick! Yes, a glue stick, because its for gluing paper, and this flag is made of paper. Other glue types wont do it right: superglue makes the whole thing sticky, PVA glue is too wet and paper doesn't like that. So put glue on both (inner) sides of the banner.

- Put a piece of tin-foil on the banner, and bend both sides on it! Watch for being symmetric, all edges has to be more or less flush.

- Push both sides together between flat surfaces for a while.

- Now cut around the edges with scissors. If the edges were not flush, cut it, somewhere between.

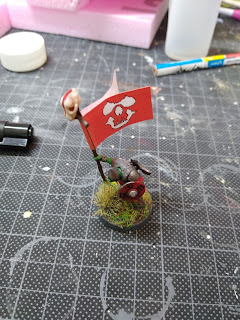
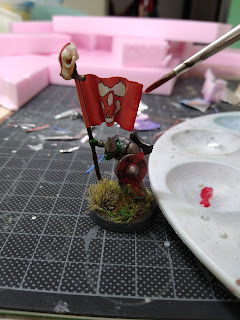
- Now comes the magic! Make the flag wavy. Just bent it as you like, as you imagine a wind blown banner! Because of the tin-foil, it will hold the form (with a bit of springback). But its easier to bent it as long as the glue is not completely set. After it is, its not impossible, but a bit harder to do.

- Its time to fix the edges. Wait for the glue to set, and then prime the edges. Unfortunately thats not optional, because acrylic paints doesn't stick well to tin-foil, but a polyurethane primer does (I use Vallejos surface primer). After the primer dried, you can paint the edges with the proper (not like me...) color. Maybe a little blending in with diluted paint helps.
- Varnish. Matte. Fabrics usually arent glossy (unless you want something magical). And then put your unit together, place your freshly baked banner bearer in the front line, and enjoy the view!


Great work BZ, they look smashing. A nice tutorial too, I will check out the software link too.
ReplyDeleteRegards,
Paul.
Thank you, that flag designer is really easy to use, and the options are great!
Delete