Grimdark is written on the flag of GW (between a lot of skulls and £-signs), but who really made this style, was John Blanche (as a GW employee), so its also called blanchitsu. What does it mean? I dont want to write an essay about its core elements (as if I could...), if you're interested in it, I would recommend to read more about it, for example here. But just a sort summary, that we can go on: its a dirty, dark, sinister looking (okay, lets call it grim) painting style.

To be honest, Im not inconditionally fan of it. Its certainly looking very cool on individual miniatures, or on small groups. But I think, that a whole army painted like this looks like a big, dark mess. As more miniatures You have on the table, the more variety You need to be able to distinguish them. And blanchitsu its not about the variety... But about a lot of other things, so I wanted to try it too!
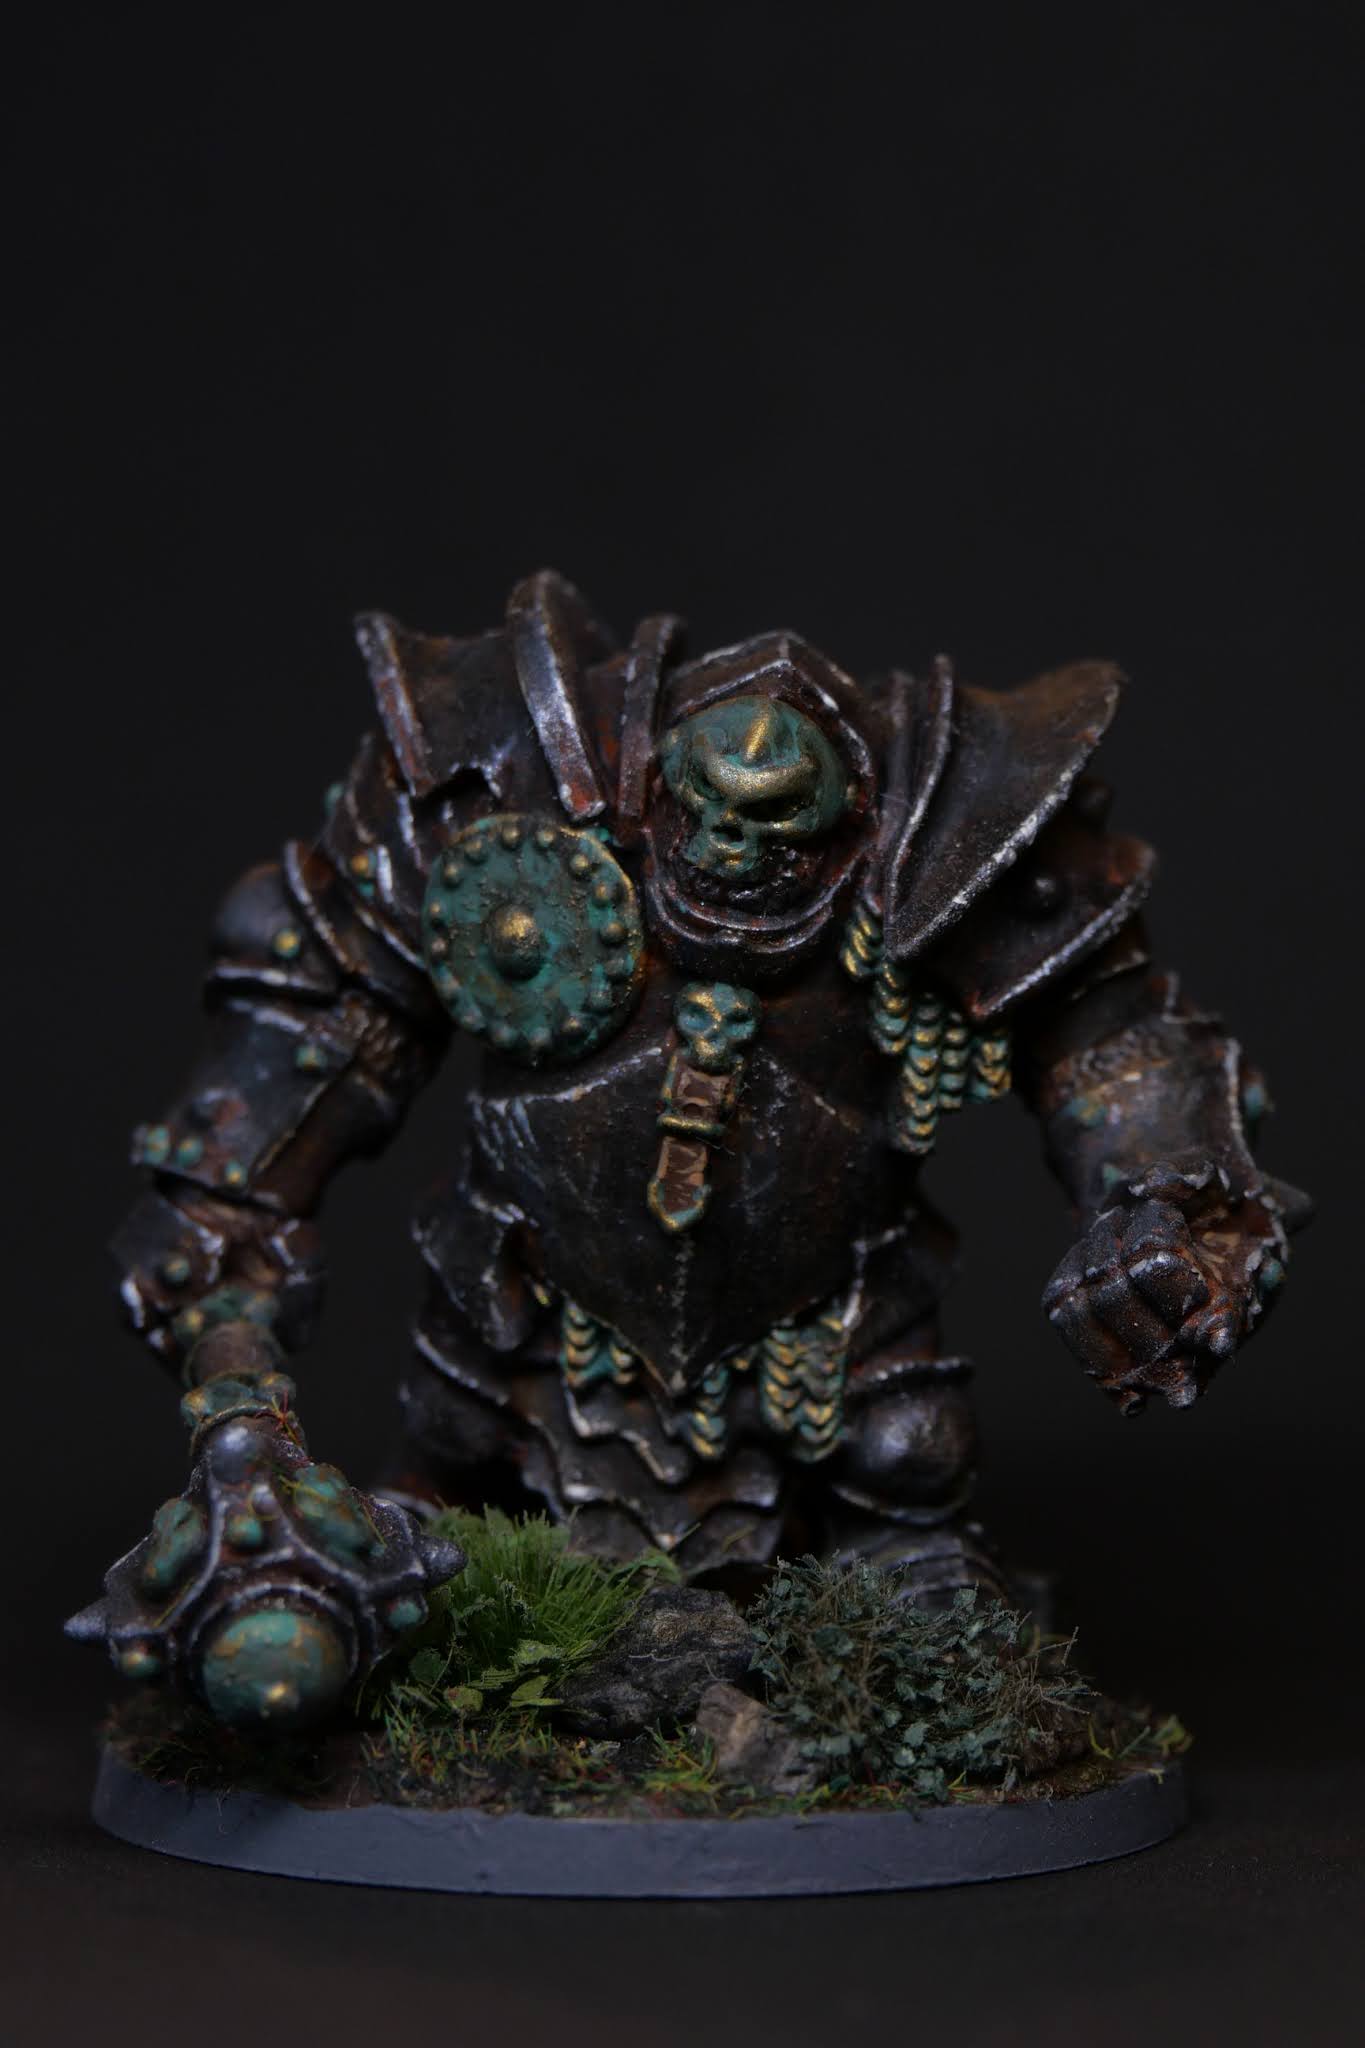
The first step was to find a fitting miniature for my experiment? No! The process was actually the other way around: I had a miniature, and was thinking about a fitting paint scheme for it... It was Bobby Jackson's amazing sculpt, the Maggotcrown ogre juggernaut (thank god its not made of the bendy, soft Bones Plastic, but the much better Bones Black). After long-long courting (I didn't knew for what I should use it), I finally ordered it. As it arrived, I was very happy about it, but still hadn't any clue what it should represent on our gaming table. An undead ogre in full plate armor...

The more I thought about it, as more sure I was, that I need to convert it somehow... I finally decide myself, made some plans, grabbed a knife and some green-stuff:
- I cut the skull, and used only the front side of it, from eyebrow-line to the upper teeth.
- I sculpted a helmet from green-stuff, with the skull-part as a visor (inspired by General Kael from Willow). I tried to keep the top part in the style of the whole armor, and used chainmail as a chin/mouth guard.
- I had to cover every part, where the rotting flesh was visible. I started sculpting chainmail in the joints (armpits, crook of the arm and ham).
- A full plate-glove for the hands would have been too complicated, so I just sculpted some plates, as it were worked on a leather glove.
- For the heels (why were they uncovered?), I sculpted some claw-like armor, which rhymes on the front of the feet.
- As the last step, I removed that coffin shaped besagew, and replaced it with a cool-looking round shield.
And I was really happy with the result! Now it can be a lot more than an undead ogre in full plate armor:
- An legendary ogre champion in Oathmark
- A major demon, or an evil kind of large construct in Frostgrave
- Some big bad evil/undead monster, for example an undead ogre in full plate armor
- I added some rusty texture to some parts of the armor (with Typhus Corrosion, but some other fine texture paste could also do the job).
- Basecoated everything, with a rusty tone (mixed an orange-brown tone, not too dark, but not too vivid either).
- Now comes the important part: speckled (fine, perpendicular stamping with big, soft brush and a small amount of paint) a dark grey on the armor. It should cover the most parts, but the rusty basecoat should be visible in some places.
- Drybrushed it with a darker metallic color. Dont be too heavy with it, most parts should still look dark grey, but it should have some metallic shine.
- Used a black wash over the whole miniature (pooling is not a problem now, it just looks more dirty).
- Made (or at least tried to make) some fresh damages, scratches on the armor with a fine brush and silver paint.
- Made some rusty spots and streaks, to get a less uniform look.
- Highlighted the edges with rugged lines. If these lines are too smooth, the edges will look too even. But if they are rugged and uneven, the edges look jagged, damaged, and this is what I wanted.
- A lot of back and forth between 4. and 8. until the result was pleasing...
- Verdigris (I mixed turquoise, light green and white paints) basecoat.
- Drybrush with bronze.
- All-over dark brown wash.
- Selective verdigris wash (the former paint diluted heavily).
- Highlighting edges and scratches with bronze.
- Back and forth as usual.


Special thanks to Ana Polanscak, whos work gave a lot of inspiration!
A cracking job BZ on both the conversion and the painting. Well done.
ReplyDeleteThanks You, I very much appreciate it!
DeleteI like it. Great results!
ReplyDelete